....by Tom Hull

| REPAIRS/RESTORATION |
| REPRODUCTION PARTS |

Many of the old Christmas houses have missing fence posts and most of them used what we call "firecracker technology" to make them. All this is, is a strip of newspaper rolled up tightly and glued much as firecrackers are. I have had some mouse-gnawed posts that revealed the Japanese character marks of the newspaper underneath the paint so we know that is what they were using. Leave it to the Japanese to use every scrap of resource available to them. And this was their most common post. Where square fenceposts are called for one can go to the local hobby store and get square stock balsa or spruce used in model airplane building of the appropriate dimension and then cut off a piece and install. The square stock is useful also for replacing missing front door steps too. There are a number of supplies in both hobby and craft stores that are indispensable to the restoration process. This article is an attempt to illustrate how these firecracker fenceposts are constructed and installed. This is a fairly basic task that almost anyone can do. Materials and tools you will need are; White glue - I always use Aileen's Tacky glue, toothpicks, a strip of chip board (old tablet backs or shirt boards work too.), a sheet of newsprint, a pad of sticky notes, scissors. a sharp pencil and a good pair of curved finernail scissors.
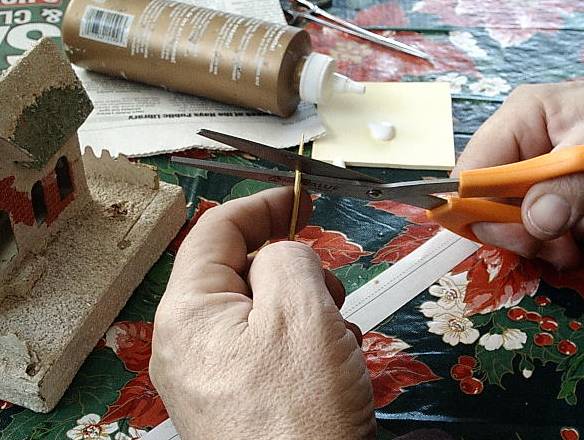
This toothpick method is a technique new to me that has been developed by Papated and makes a much stronger post than a conventionally rolled up strip of newspaper. First cut off the end of the toothpick as shown above. This will serve to roll up the strip of newspaper. Measuring the width of the strip is just an approximation gained by holding the newspaper up to the fence and marking it where you will cut the strip. The strip should at least project approximately 1/4" to 3/8" above the fence.
I first put a bit of glue on the toothpick.

And then I begin to roll up the strip on the toothpick. In this photo you can see me applying the tacky glue in front of the rolling process with another toothpick. When you start this process be sure the cut-off end of the toothpick is about an 1/8" or so inward from the end of the paper as the old firecracker posts always had a little hole in the top of the post. Notice the sticky note pad in the background I am using as a glue palette. When done you just tear off that page and throw it away.
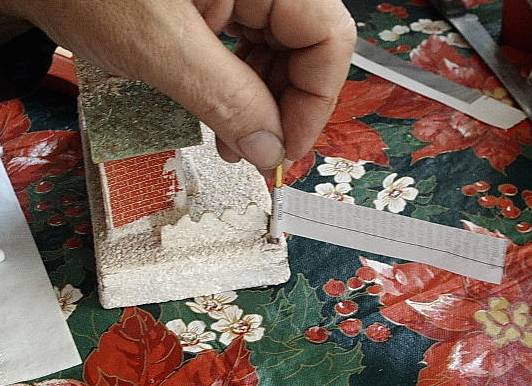
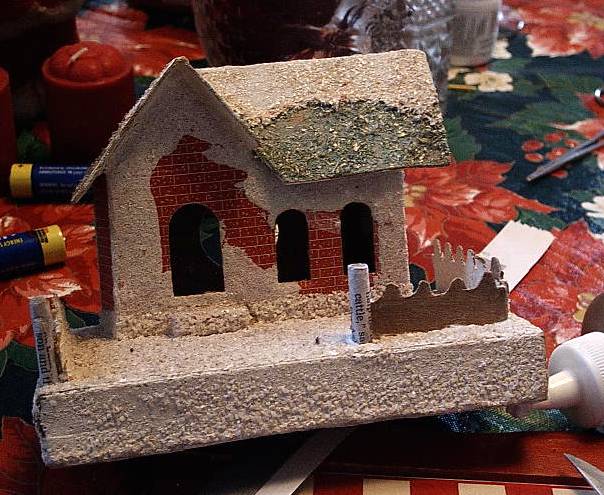
This shows how I measure the diameter of the post. This particular missing post left a hole in the dried paint that it is necessary to fit the post into. When you have enough wrapped up you snip off the "flag" end of the strip and glue down the fly edge.
This shows getting ready to glue the fence post in place. This particular fence had the posts sitting directly in front of the fence so it will be necessary to put glue on the fence where it touches the post before installing the post. The hole to insert the toothpick projecting from the post was made by pushing the sharp end of the toothpick through the cardboard. It is then necessary to cut off some of the projecting end of toothpick before gluing the post down so that it won't bottom out on the bottom of the base. Though the originals never had toothpicks in them it does make for a more durable post. Notice that in this shot that a part of the fencing is missing which I will do next.

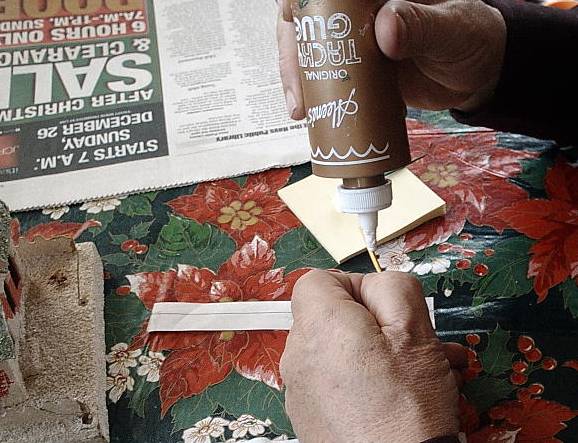
This illustrates the method I use to get a good match to the fence you are using. This requires a very sharp pencil and you hold it at an inward angle to the fence to get as close to the fence pattern as possible. This is a piece of chipboard cardboard.

This fence had a projection of the fence broken off and I needed to make a longer section of fencing to replace that too. All you need to do is scoot the chipboard strip down and continue marking the card. Because the chipboard card is much thinner than the original cardboard fences I glue another strip of the same width and length to the back of this one and cut the fence out with a good quality of curved fingernail trimming shears while the card is still damp with the glue as it makes the cardboard easier to cut and handle. I prefer the fingernail scissors to be serrated on one edge as it grips the card better and doesn't slip around as much. In cutting this out be sure and cut slightly below the penciled line as following the line, on or above it will create overlarge crenellations.
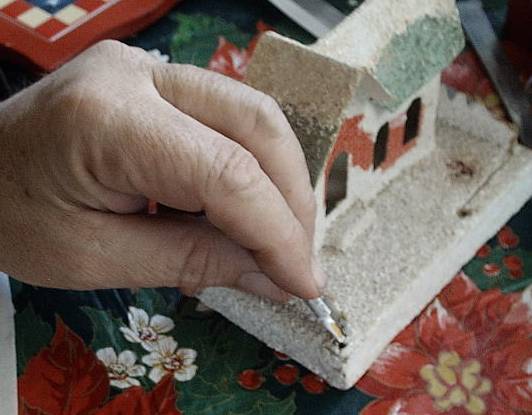
And here is the completed installation of the fence and posts The crenellations on the fence are unfortunately not too well done as I had misplaced my good curved fingernail scissors and had to use an inferior flimsy un-serrated pair of curved fingernail scissors that slipped about a bit and were difficult to control. However when painted it probably won't show that much. Notice that the two posts are of different diameters and match the original "footprints" of the missing posts. This sort of irregularity was common and is part of the handmade charm of these houses.
All that remains to do here is to put on a finish. I will paint this with flat latex interior house paint that has been tinted with a little yellow ocher and perhaps a bit of "Payne's gray" acrylic paint. After applying the paint I will then sprinkle, while the paint is still wet, either fine sand or in this case given the course nature of the original finish, probably some model railroad (medium) ballast as it will match the texture better. After this coat dries I will then go over it again with the paint adjusting the tint of the paint if necessary. (Paint always dries about a shade darker than when in the wet state.) This last coat will cover any of the exposed grit and you may want to sift some mica "snow" with a fine tea strainer over this while it is still wet to add a bit of sparkle. That's all there is to it folks! :-)
For information about this site, please contact us at:
http://cardboardchristmas.com/papateds/contact.htm
|
Copyright 2000-2012 Theodore H. Althof,Jr.Except where noted, the contents of this website and all it's pages and submissions therein contained are the intellectual property of Theodore H.Althof,Jr. All rights are reserved. (Background musical selections are,of course, excepted.)
|
| This archive was set up at Ted's request in early 2012, and, except for critical updates and announcements, will remain as Ted left it in October, 2012. The archive is kept online with the help of volunteers from the following affiliated sites and resources: |
|||||
| - Christmas Memories and Collectibles - | |||||
 |

|

|

|

|

|
| - Family Activities and Crafts - | |||||
 |

|

|

|

|

|
| - Trains and Hobbies - | |||||

|

|

|  |

|
 |
| - Music - | |||||

|

|
 |

|

|
 |